JUTYE SANITARY
A leaking Angle Valve may look like a minor bathroom problem. It can begin as one clear droplet under a sink. Then moisture reaches the cabinet base, wall, or flooring. The cause is not always obvious. A worn washer, damaged seal, loose compression nut, or corroded valve body may be responsible. That assumption can be wrong.
The U.S. Environmental Protection Agency’s WaterSense program reports that household leaks waste nearly 1 trillion gallons of water annually in the United States. It also estimates that the average leaking household can waste more than 10,000 gallons each year. These figures show why a small leak deserves prompt attention. They also support a careful inspection, rather than immediate replacement. A professional plumber will usually dry the area, identify the leak point, check the supply tube, and inspect nearby fittings for corrosion. Simple work, but easy to rush.
The International Association of Plumbing and Mechanical Officials emphasizes correct installation, material compatibility, and reliable shutoff performance in plumbing systems. Those principles matter when evaluating an Angle Valve. A valve that stops turning smoothly may be near failure. A green or white residue can indicate long-term mineral buildup. Water around the handle may suggest a stem seal problem, while water at the connection may indicate a compression fitting issue. Do not overtighten it. Excessive force can damage threads or deform the seal. Some older valves should be replaced instead of repaired. The practical answer depends on the valve type, age, water pressure, and visible condition. This guide explains those warning signs and the safer repair decisions behind them.
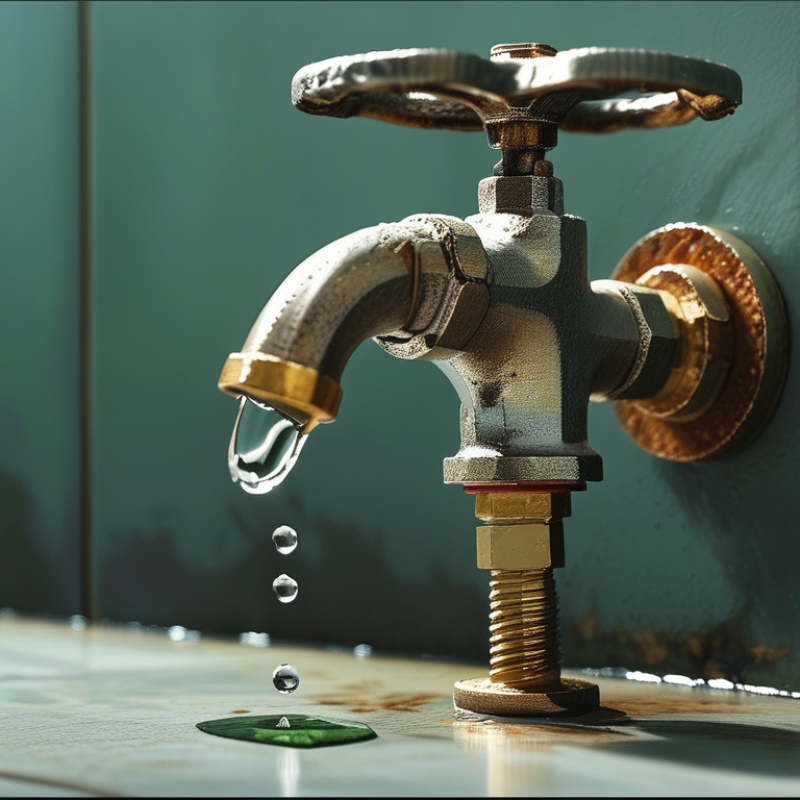
An angle valve controls water flow to a toilet, faucet, or appliance. Its small handle allows shutoff without closing the main supply. Inside, a stem, packing area, and compression connection hold back constant pressure. That pressure never sleeps.
The U.S. Environmental Protection Agency’s WaterSense program reports that household leaks can waste more than 10,000 gallons annually. A leaking angle valve may waste far less, but it can still damage cabinets and flooring. The Insurance Information Institute’s 2017–2021 claims analysis identifies water damage and freezing as roughly 24% of homeowners insurance claims. This makes a small valve worth inspecting early.
Leaks commonly start at the packing nut, the valve outlet, or the supply-line connection. A damp ring around the handle often points to worn stem packing. Water at the threaded outlet may indicate a loose connection or damaged sealing washer. Corrosion can hide beneath the nut. That diagnosis is not always clean.
In practical inspections, dry the valve completely first. Then place a tissue beneath each joint and reopen the supply slowly. The first wet spot usually reveals the source. Do not overtighten the packing nut; it can make the handle stiff and distort internal parts. I have seen valves appear sealed after tightening, then drip again hours later. Temperature changes and pipe movement may expose a weak connection. Replacement is often safer when the valve body feels rough, cracked, or heavily corroded.
Why Is My Angle Valve Leaking?
How to Identify the Exact Source of an Angle Valve Leak
A leaking angle valve does not always leak from the valve body. Water may travel along the pipe and appear at the lowest point. Dry the entire area with a clean towel. Then open the supply slowly and watch the first place that becomes wet. A small strip of toilet tissue can reveal drops that are difficult to see.
Check the compression nut, valve stem, outlet connection, and wall-side pipe joint. Look for white mineral deposits, green discoloration, rust, or a split in the supply hose. Place a dry paper towel under each connection. Touch the towel after several minutes. This simple test can separate an active leak from old moisture.
Do not rely on appearance alone. A valve may stay dry until the fixture runs or the water pressure changes. Close the local shutoff before tightening any connection. Use a wrench carefully, and avoid forcing the nut. Overtightening can damage the fitting or distort its sealing surface. I have found that rushed inspections often blame the valve too quickly. The real source may be the hose above it or the pipe inside the wall. If water continues behind the wall, stop testing and arrange a qualified plumbing inspection. A controlled pressure check can confirm the source without unnecessary dismantling.
| Inspection Area | Typical Visual or Physical Sign | Simple Diagnostic Check | Most Likely Cause | Recommended Action | Urgency |
|---|---|---|---|---|---|
| Compression Nut | Water appears around the nut where the supply pipe enters the valve. | Dry the valve completely, place a tissue around the nut, and open the valve. Moisture on the tissue identifies the connection as the leak point. | Loose compression nut, damaged compression ring, or a pipe that is not fully inserted. | Shut off the water, reseat the pipe, and tighten the nut gradually. Replace the compression ring if it is deformed or damaged. | Medium |
| Valve Outlet Connection | Water collects where the flexible faucet or toilet connector attaches to the valve outlet. | Wrap a dry tissue around the outlet connection without covering the valve body. Check for fresh moisture while the fixture is operating. | Loose connector nut, damaged rubber washer, cross-threading, or a connector that has reached the end of its service life. | Close the supply, remove the connector, inspect the washer and threads, and replace worn parts. Do not use thread tape on a connection that seals with a washer. | Medium |
| Stem or Handle Area | Water beads form directly behind the handle or around the valve stem when the valve is open. | Dry the handle and stem area, then turn the handle slowly. If water appears at the stem, the stem seal is likely leaking. | Worn stem packing, deteriorated O-ring, or a loose packing nut. | Close the valve if possible and tighten the packing nut slightly. Replace the stem seal or the complete valve if the leak continues. | Medium |
| Valve Body | Water emerges from a crack, pinhole, seam, or corroded section of the metal body. | Dry the entire valve, then inspect it under a bright light while the line is pressurized. A body leak will reappear away from the threaded or compression joints. | Corrosion, freeze damage, manufacturing defect, or mechanical stress from an overtightened connection. | Replace the angle valve. Do not rely on sealant, putty, or external patches for a pressurized body leak. | High |
| Wall-Side Inlet | Moisture appears where the valve enters the wall fitting, sometimes with staining on the wall or trim plate. | Dry the valve and wall-side threads, then observe the joint while the water is on. Check whether moisture begins behind the valve. | Failed threaded seal, loose connection, damaged wall fitting, or movement in the supply pipe. | Shut off the main or branch supply before removing the valve. Inspect the wall fitting and use an appropriate replacement valve and sealing method. | High |
| Drain or Bonnet Joint | Water leaks from a removable cap, drain opening, or joint on a multi-port angle valve. | Dry the joint and place tissue below it. Operate the valve or fixture to determine whether the leak starts at the joint. | Loose cap, damaged gasket, worn internal seal, or debris preventing a proper seal. | Close the water supply, remove and inspect the gasket or seal, clean the sealing surfaces, and replace damaged components. | Medium |
| Internal Shutoff Mechanism | The fixture continues to receive water after the angle valve is turned off, even though no external drip is visible. | Close the angle valve and open the fixture. A short release of residual water is normal; continuous flow indicates internal failure. | Worn washer, damaged cartridge, mineral deposits, or debris inside the valve. | Replace the internal service part if the valve design permits it; otherwise replace the angle valve. | Medium |
| Supply Hose | Water runs down the flexible hose and makes the valve appear to be leaking. | Dry the hose, valve, and nearby surfaces. Observe the hose from end to end while the fixture is operating. | Cracked hose, damaged braided covering, failed hose-end seal, or excessive bending. | Replace the complete supply hose if the hose itself leaks. Do not repair a pressurized flexible hose with tape. | High |
| Condensation | A thin film of water appears on the valve or pipe, usually during humid conditions or when cold water is flowing. | Dry the surface and monitor it without operating the fixture. Condensation forms evenly on a cold surface rather than starting at one joint. | Warm, humid air contacting a cold valve or supply pipe; this is not necessarily a plumbing leak. | Improve ventilation, insulate the cold pipe, or reduce humidity. Continue monitoring to confirm that no joint is leaking. | Low |
| Leak Confirmation | Multiple areas are wet, making the original source difficult to identify. | Turn off the water, dry all surfaces, place separate tissues at each joint, then restore pressure and inspect from the highest wet point downward. | Water is traveling along the valve, pipe, hose, or cabinet surface from a higher connection. | Identify the first point that becomes wet rather than the lowest point where water accumulates. Repair the confirmed source and retest. | Medium |
Why Is My Angle Valve Leaking?
Common Causes of Leaking Angle Valves
A leaking angle valve usually points to a worn seal, loose connection, or damaged valve body. The small valve beneath a sink works under daily water pressure, often unnoticed for years. Its rubber washer or O-ring can harden, crack, or flatten. Mineral deposits may also prevent the valve from closing completely.
A loose compression nut is another frequent cause. However, overtightening can deform the ferrule and create a worse leak. Corrosion around the threaded outlet may indicate deeper damage, not just a poor connection. The U.S. Environmental Protection Agency’s WaterSense program reports that household leaks can waste nearly 10,000 gallons of water annually. That figure makes a slow, steady drip worth inspecting quickly. In practice, placing a dry tissue below the valve can reveal moisture before visible pooling appears. This simple check is easy to overlook.
Tips: Shut off the main supply before removing the valve. Dry the area, then identify the exact leak point. If water escapes from the stem, replace the internal seal or the complete valve. If it leaks at the compression joint, inspect the ferrule and tubing for scratches. Do not rely on excessive wrench force. It feels secure, but it can damage the fitting. EPA guidance also recommends repairing household leaks promptly. A qualified plumber should assess corroded pipes, concealed moisture, or repeated leaks. Sometimes replacing the entire valve is safer than repairing one small part.
Common causes of leaking angle valves and their practical inspection priority.
A leaking angle valve is commonly linked to worn internal seals, a loose connection, damaged threads, corrosion, or excessive tightening. Start by identifying the exact leak point: the stem, compression connection, outlet connection, or valve body. Shut off the water supply before tightening or replacing any part.
Place a dry cloth under the angle valve and watch where moisture appears. A leak may come from the outlet, stem, compression nut, or wall connection. Do not tighten anything yet. Turn the handle gently and note whether the dripping changes. If water sprays, shut off the main supply immediately. Keep a small bucket nearby, because slow leaks can become surprisingly messy.
Wipe the valve completely dry, then wrap tissue around each joint. Check the tissue after several minutes. This simple test often reveals the true source better than touch alone. Inspect the pipe, nut, and valve body for green deposits, rust, cracks, or mineral trails. A loose packing nut may need slight adjustment, but excessive force can damage the valve. I have seen people tighten a dry joint and create a larger leak later.
Confirm whether the leak starts only when the connected fixture runs. If so, the hose washer or fitting may be responsible, not the angle valve itself. Check the shutoff function by closing the handle slowly. Water should stop without grinding or excessive resistance. Older valves can appear sound outside while failing internally. Take a clear photograph before removing anything. It helps you remember the original connection, though photographs cannot replace careful inspection. If the valve body is cracked, corroded, or stuck, stop testing and arrange a qualified repair.
Close the main water supply or the valve serving that fixture. Open the faucet to release pressure, then disconnect the supply tube with an adjustable wrench. Inspect the valve body for cracks, heavy corrosion, or mineral buildup. A slightly loose packing nut may need only a gentle quarter-turn. Do not force it. Excess pressure can damage the valve or connected pipe.
If the valve still leaks, replacement is usually safer than repeated tightening. Remove the old valve carefully, supporting the pipe to prevent twisting. Clean the exposed threads and install a compatible replacement with approved thread sealant where appropriate. Compression fittings need a clean tube and a properly seated ferrule. They should not be overtightened.
If the shutoff will not close, the pipe is damaged, or corrosion reaches the wall connection, stop the repair and contact a qualified plumber. A small leak can hide behind cabinetry.
: Water may travel along the pipe and appear below the actual leak. Dry the area completely. Open the supply slowly. Watch for the first wet spot.
Check the compression nut, valve stem, outlet connection, and wall-side joint. Place dry paper towels beneath each connection. Check them after several minutes.
Yes. Press a narrow strip of toilet tissue against each joint. Even tiny drops usually leave a visible mark. It is simple but useful.
Look for white mineral deposits, green discoloration, rust, or damp cabinet surfaces. Old moisture may remain after the active leak stops. Appearance alone can mislead you.
Close the local water supply first. Try only a gentle quarter-turn. Never force the nut. Overtightening can damage the fitting or sealing surface.
Replacement is safer when tightening does not stop the leak. Also replace valves with cracks, heavy corrosion, or serious mineral buildup. Repeated tightening is not a repair strategy.
Shut off the fixture supply or main water supply. Open the faucet to release pressure. Support the pipe while removing the old valve. This prevents twisting.
Turn the water on slowly. Watch every joint for several minutes. Check again after the cabinet dries. Small leaks may appear only at full pressure.
Stop if the shutoff will not close, the pipe is damaged, or corrosion reaches the wall. Continuing can hide water damage behind cabinetry. I might blame the valve too quickly.
An Angle Valve controls the water supply to fixtures such as sinks, toilets, and washing machines, making it easy to shut off water when needed. Leaks commonly begin around the handle, compression nut, threaded connections, or the valve body itself. To identify the exact source, dry the valve completely, reopen the water supply, and watch for the first point where moisture appears. This helps distinguish a loose connection from a worn internal component or a damaged valve.
Before attempting repairs, shut off the main water supply, release pressure, and place a container beneath the valve. Check whether fittings need tightening and inspect washers, seals, and threads for wear or corrosion. Minor leaks may be resolved by replacing a seal or carefully tightening a connection. However, if the valve body is cracked, heavily corroded, or continues leaking, replacing the entire Angle Valve is usually safer. Work slowly, use compatible parts, and test the connection gradually for leaks after installation.
